

Designing a garment can be an overwhelmingly complicated process. With many elements factoring into the design process as well as incorporating business strategy, it can become very stressful. Throughout my time at Michigan State, I have had to design many garments from start to finish. This knowledge I carried to my internship at MATURE. In this article, I will share with you the step by step creative process I have followed while making a garment, as well as some helpful hints to make this process easier.
What Are the Steps to Designing Your Own Garment or Collection?
The first step in this process is establishing brand identity and deciding what type or style of garments you want your company to design. Establish what type of area in design you wish to pursue ( menswear, bridal, activewear, etc…) this will help you simplify what type of garments you will design.
Afterwards, take a moment to research all the different types of garments you can create within the field you have selected. For instance, if your company is pursuing bridal design you can create much more than just bridal dresses. Consider designing veils, belts, shoes, etc… as well. Explore the different styles you want to create your garments with. Vintage, minimalist, exotic, Add your own personal touch to every garment to make your garment unique.
A helpful tip I have learned when establishing brand identity is to incorporate a unique aspect into all of your designs. Adding an interesting logo or symbol onto your garments and accessories will help make your brand popular and easily identifiable. To look for some examples, look at major design houses across the world. Louis Vuitton handbags include their iconic LV logo. Tommy Hilfinger made his garments unique by adding a red white and blue color block onto every design. Even sports teams such as the Detroit Lions and Michigan State Spartans are recognized by their logo. Incorporating unique touches to your products will drive sales up.
Establishing brand identity will help you begin exploring what designs your company can pursue. Creating your own logo to define your brand is another great step in this process. You can begin to organize your styles and design plans from there.
After establishing brand identity and having selected the type of garments you would like to design, the next step is to choose your theme and create a mood board for your upcoming collection.
A concept board or concept montage is a series of photographs, color palettes, fabric swatches, etc.. arranged to interpret a concept or theme that will be conveyed in your garment or accessory designs. Though this is a concept “ board” it is not necessary for it to be articulated on a physical board. I recommend completing a concept board digitally so that it is easily shared and changeable amongst others at any time.
Here is an example of a concept montage I completed for a course at Michigan State. My theme was water, and my concept was a self reflection of my journey of becoming more transparent, flexible, and fluid. I conveyed this by incorporating pictures of moving water into my montage. I added in the teal and blue shades to reveal my anticipated color palette for the project. Finally, I added in the blue chiffon and white silk swatches I would be constructing my garment out of. Try to use as little text as possible when constructing your board. It is valid to use a short piece of text as your montage to help convey a theme or add a title, however, designers will not be interested in reading long paragraphs of text explaining your theme when pictures can articulate it just as well. Overall, use whatever imagery needed to help explain your theme of your upcoming design.
Before you begin to design the physical garment you wish to create, I encourage you to establish a fixed budget for this project. Take into account different costs for fabric, trims and finishes, and other production supplies. Establish a dialogue between your designers, manufacturers, and anyone else who will be assisting you on this project so negotiate their payment for their work towards the project. Be sure to also take into account your anticipated profit and sales you make off of your garments as well.
Once you have established your budget, a theme, and a constructive montage, you can begin to design your garment. This has always been my most personal favorite part of the process because now you can begin to visualize what your garment will look like. I suggest beginning with a croquis sketch. A croquis sketch( pronounced crow-key) is a sketch of how your garment will look on a human body. An actual croquis is a quick drawing sketch of a model to visualize what your garment will look like when worn by a person. It’s ideal to add in as many details, such as patterns, fabric texture, accessories, color, etc.. to best articulate how you want your garment to look.
Here is an example of a few croquis I designed at Michigan State. Though croquis are supposed to mimic human beings, they often will have elongated features to help incorporate all the details of your garment. Take note of how it is important to add in details about how the fabric will crease and lay on different areas. Also, establish a light source and draw in where the light will fall on your sketch. In my drawing above, my light source is hitting my croquis head on. I added highlights on the front of my sketches, and created shadows along the sides and creases of my garments and croquis. It is important to create a croquis sketch because it will help you and your team of designers visualize what your garments will look like when worn. You can begin to make any design adjustments from this point on. These designs are often done either by hand or digitally in Adobe Photoshop or inDesign.
After completing and approving a croquis sketch, draw a basic flat sketch of your garment. A flat sketch is a simple drawing of how your garment would look like lying on a flat surface. Contrary to a croquis sketch, it is a very basic drawing of your garment.
Here is an illustration of a flat sketch. No colors or elaborate design details are included. However, construction details such as seam placements, darts, pockets, buttons and buttonholes, and yokes are included in this sketch because it shows others the basic constructions of your design. It is important to include details such as these to clarify how you want your garment produced. These sketches are important for communicating with your team members and manufacturers a visual articulation on how you want your garments to look after production. A flat sketch will need to be included in your tech pack.
A tech pack is an important aspect of this process. It is the blueprint you will be sharing with your manufacturer. Assembling a tech pack includes adding in many different technical components such as your flat sketch, garment measurements and sizes, delivery dates and addresses, fabric swatches, and other production details. You can read more about how to construct a tech pack in my previous article, How To Build a Tech Pack In A Few Easy Steps – 440 Industries.
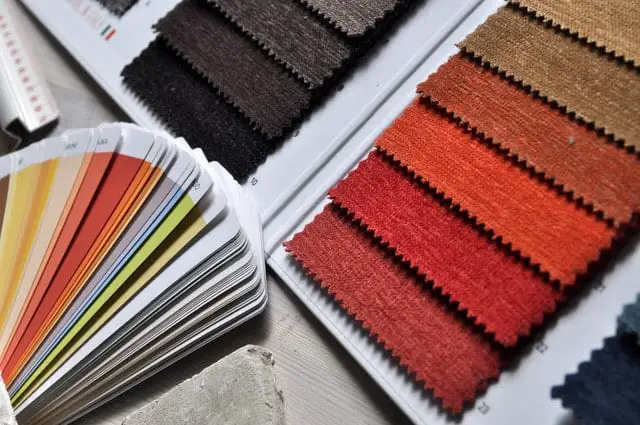
Before you begin reaching out to manufacturers for garment production, it is important to do two things. First off, begin researching and contacting different fabric mills and manufacturers to help you begin your garment .Fabric mills will help you select and produce the best textile for your project. They can also possibly recommend a manufacturer to help build your garment. I suggest selecting a domestic manufacturer to insure better quality control over your garments. If one is not available, try taking a more sustainable approach by working with a manufacturer in a country that mandates clean energy practices.
The second task to check off on your to do list is to create a label. Most manufacturers will not work with you until you send them a label. I suggest constructing a label that includes your company name and the date it was established. Elaborate labels are not necessary. A label and sizing tages are the only tags you need to provide yourself. Most manufacturers will provide garment care tags and add them along with your other labels and tags into your garment.
Once your garment has been designed and constructed, be sure to advertise it! I suggest launching a new collection one of two times a year, either the spring or fall times.When beginning to advertise your business, make sure you market on various platforms. Advertise garments and collections on your company website and social media platforms. Network with influencers and other companies to showcase your work.
A Great Online Class: Design and Create a Clothing Collection by Domestika
If you are interested in learning more about how you can create a clothing collection, we recommend taking a look at the online class “Designing Your Clothing Collection”.
The course is currently under promotion, but you can use the discount code: T_BROWNLEES-PROMO to get an additional 10% discount on your purchase.
This online class offered by Domestika, at a very inexpensive price covers all you need to know to create your clothing collection, from developing your sketches to designing accessories and more. If you apply to the course through the link below you’ll be supporting 440 Industries, and we thank you for it!
Why Do We Need to Have This Knowledge?
These are the basic steps on how to create and advertise your own garment from a designer’s perspective. None of the steps are replaceable or should be skipped. Completing this process step by step is the key to keeping your ideas and designs organized. These steps will help the design process move quickly and easily for you. You will avoid costly setbacks and delays, and improve communication between team members throughout this process.
Designing a garment may sound glamorous and exciting, but individuals often discount the amount of work that goes into the process. Each creative step from creating a theme to drawing a flat sketch, to every business element from reaching out to various companies and crunching market numbers is difficult. I hope today you have found my process of designing a garment will help you in your journey of design.